Hello World! Virtually!
Although SONiC is powerful, it is usually not cheap to get a switch that supports SONiC. If you would like to give SONiC a try, but don't want to spend too much money on getting a SONiC-supported device, then you are in the right place. This chapter will guide you on how to use GNS3 to build a virtual SONiC's Lab locally, so that you can quickly experience the basic functionalities of SONiC locally.
Despite there are multiple ways to run SONiC locally, such as docker + vswitch or p4 switch, for first time users, using GNS3 is probably the most convenient and fast way. So, we will be using GNS3 as an example in this chapter and introduce how to build your own SONiC lab locally. Now, let's get started!
安装GNS3
FIrst, to make it easy and intuitive to set up a virtual network for testing, let's get GNS3 installed.
GNS3,全称为Graphical Network Simulator 3,是一个图形化的网络仿真软件。它支持多种不同的虚拟化技术,比如:QEMU、VMware、VirtualBox等等。这样,我们在等会搭建虚拟网络的时候,就不需要手动的运行很多命令,或者写脚本了,大部分的工作都可以通过图形界面来完成了。
安装依赖
Before installing GNS3, we need to install several other softwares: docker, wireshark, putty, qemu, ubridge, libvirt and bridge-utils. Please feel free to skip this step, if you have already have them installed.
First is Docker, we can follow their official doc to get it installed: https://docs.docker.com/engine/install/
The rest softwares can be easy installed on ubuntu, by running the following commands. Note that the installation process of ubridge and Wireshark will ask if you want to create a wireshark user group to bypass sudo. Please be sure to select Yes here.
sudo apt-get install qemu-kvm libvirt-daemon-system libvirt-clients bridge-utils wireshark putty ubridge
Once it is done, we can start installing GNS3 now.
安装GNS3
On Ubuntu, the installation of GNS3 is very simple, just execute the following commands:
sudo add-apt-repository ppa:gns3/ppa
sudo apt update
sudo apt install gns3-gui gns3-server
Then add your user to the following groups so that GNS3 can go to access docker, wireshark, and other functions without sudo.
for g in ubridge libvirt kvm wireshark docker; do
    sudo usermod -aG $g <user-name>
done
如果你使用的不是Ubuntu,更详细的安装文档可以参考他们的官方文档。
准备SONiC的镜像
Before testing, we still need a SONiC image. Since SONiC needs to support various of platforms, and different platform has different underlying implementation, each platform will have their own image. Here, since we are creating a virtual environment, we need to use the image with VSwitch platform to create the virtual switch: sonic-vs.img.gz.
The project for building SONiC image is here. Although we can build it ourselves, the speed is really slow. To save time, we can directly [download the latest image from here](https://sonic- build.azurewebsites.net/ui/sonic/pipelines/142/builds?branchName=master). Simply look for the latest successful Build, find sonic-vs.img.gz in Artifacts, and download it.
Then, let's get the project prepared:
git clone --recurse-submodules https://github.com/sonic-net/sonic-buildimage.git
cd sonic-buildimage/platform/vs

# Download the image under this folder, then unzip the image with following commands。
gzip -d sonic-vs.img.gz

# Run the following command to generate the GNS3 image configuration file:
./sonic-gns3a.sh
Once it is done, we can see the image file we need by running ls command.
r12f@r12f-svr:~/code/sonic/sonic-buildimage/platform/vs
$ l
total 2.8G
...
-rw-rw-r--  1 r12f r12f 1.1K Apr 18 16:36 SONiC-latest.gns3a  # <= This is the GNS3 image configuration file
-rw-rw-r--  1 r12f r12f 2.8G Apr 18 16:32 sonic-vs.img        # <= This is the unzipped SONiC image file
...
导入镜像
Now, we can run gns3 in command line to start GNS3! If you are ssh into another machine, try enabling X11 forwarding, so that you can run GNS3 remotely, but with the GUI displayed locally. This is what I am did - running GNS3 on the remote server, but with the GUI displayed locally on the Windows machine via MobaXterm.
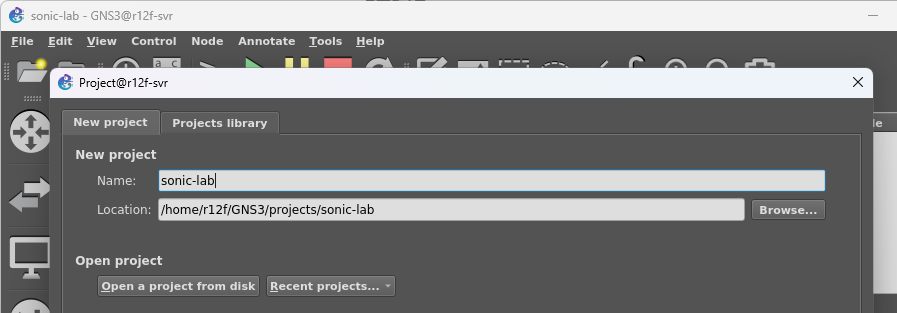
Once it's running, GNS3 will ask us to create a project, it's simple, just give it a directory path. If you are using X11 forwarding, please note that this directory is on your remote server, not your local machine.
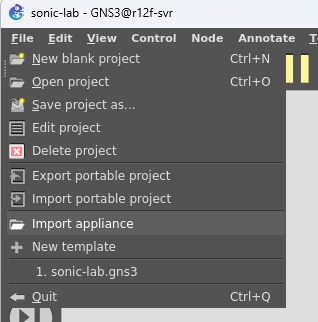
Then, we can import the image we just generated via File -> Import appliance.
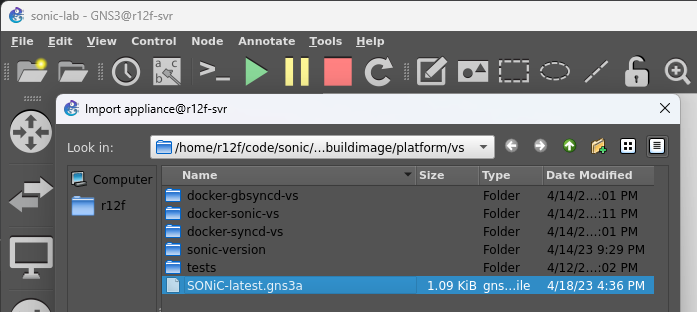
Select the SONiC-latest.gns3a image configuration file we just generated, and click Next.
Now you can see our image file, click Next.
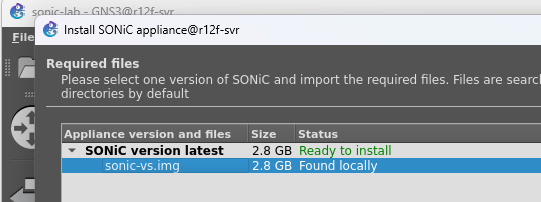
Now, it will start importing the image, this process may be slow because GNS3 needs to convert the image to qcow2 format and put it in our project directory. Once the import is complete, we will be able to see our image.
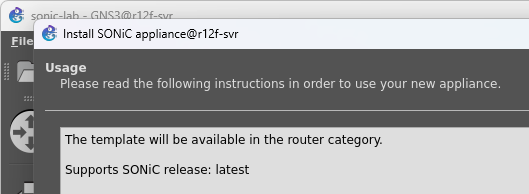
Great! Image is now imported!
创建网络
Great! Now we have everything is in place, let's create a virtual network for our testing!
The GNS3 GUI are really easy to use, Basically, simply open the sidebar, drag in the switch, drag in the VPC, and connect the wires. After everything is connected, click the Play button on top to start the network simulation. Then we should see the network starts running as below:
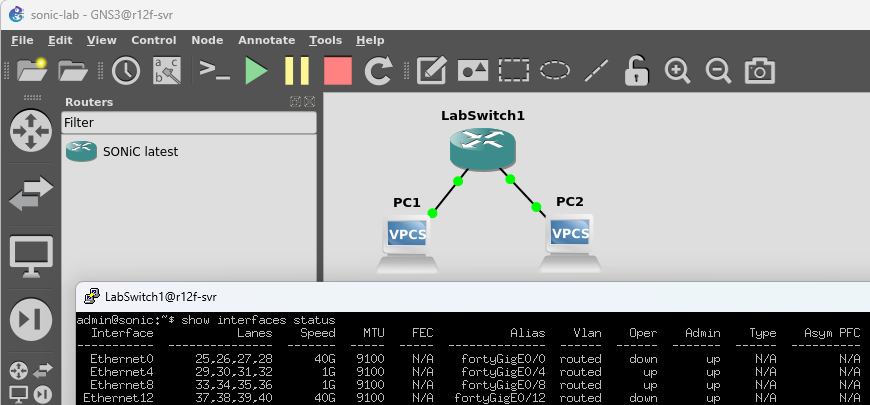
Next, right click on the switch and select Custom Console, then select Putty to open the console for our virtual switch. Here, the default username and password for SONiC are admin and YourPaSsWoRd. Once we are logged in, we can run any SONiC commands, such as show interfaces status or show ip interface to see the status of the network. As above shows, we can see the status of the two connected interfaces are both up!
配置网络
In the SONiC virtual switch, the default ports are all created as eth pairs and all uses the 10.0.0.x subnet (as follows):
admin@sonic:~$ show ip interfaces
Interface    Master    IPv4 address/mask    Admin/Oper    BGP Neighbor    Neighbor IP
-----------  --------  -------------------  ------------  --------------  -------------
Ethernet0              10.0.0.0/31          up/up         ARISTA01T2      10.0.0.1
Ethernet4              10.0.0.2/31          up/up         ARISTA02T2      10.0.0.3
Ethernet8              10.0.0.4/31          up/up         ARISTA03T2      10.0.0.5
To make everything work, the most convenient way is still creating a vlan and put all the ports in it (we use Ethernet4 and Ethernet8 here):
# Remove old config
sudo config interface ip remove Ethernet4 10.0.0.2/31
sudo config interface ip remove Ethernet8 10.0.0.4/31

# Create VLAN with id 2
sudo config vlan add 2

# Add ports to VLAN
sudo config vlan member add -u 2 Ethernet4
sudo config vlan member add -u 2 Ethernet8

# Add IP address to VLAN
sudo config interface ip add Vlan2 10.0.0.0/24
There you go! Our vlan is created, and we can check it out by show vlan brief:
admin@sonic:~$ show vlan brief
+-----------+--------------+-----------+----------------+-------------+-----------------------+
|   VLAN ID | IP Address   | Ports     | Port Tagging   | Proxy ARP   | DHCP Helper Address   |
+===========+==============+===========+================+=============+=======================+
|         2 | 10.0.0.0/24  | Ethernet4 | untagged       | disabled    |                       |
|           |              | Ethernet8 | untagged       |             |                       |
+-----------+--------------+-----------+----------------+-------------+-----------------------+
Then, we can assign a 10.0.0.x IP address to all the virtual host now:
# VPC1
ip 10.0.0.2 255.0.0.0 10.0.0.1

# VPC2
ip 10.0.0.3 255.0.0.0 10.0.0.1
Okay! Time to ping!
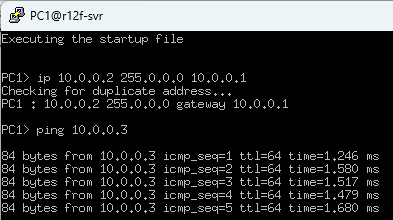
Tada!
抓包
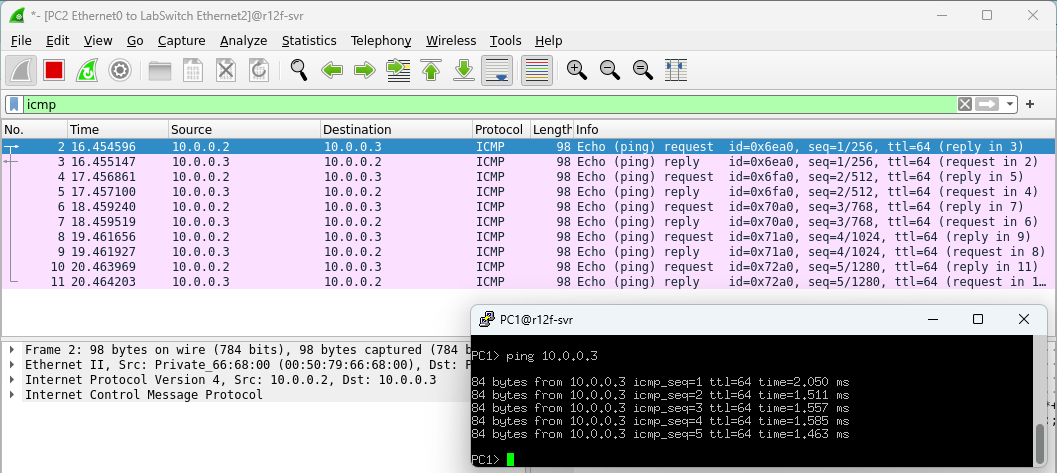
As installation process shows above, before we installed GNS3, we purposely installed Wireshark so that we can directly capture packets inside GNS3. All we need to do is right click on the link we want to capture and select Start capture.
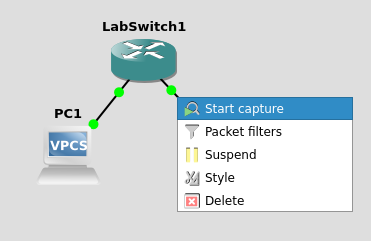
Very soon, Wireshark will be opened up and display all the network packets in real time, which is very convenient:
更多的网络
除了上面这种最简单的网络搭建,我们其实可以用GNS3搭建很多非常复杂的网络来进行测试,比如多层ECMP + eBGP等等。XFlow Research发布了一篇非常详细的文档来介绍这些内容,感兴趣的小伙伴可以去传送到这篇文档去看看:SONiC Deployment and Testing Using GNS3。