Hello, World! Virtually
Although SONiC is powerful, most of the time the price of a switch that supports SONiC OS is not cheap. If you just want to try SONiC without spending money on a hardware device, then this chapter is a must-read. In this chapter, we will summarize how to build a virtual SONiC lab using GNS3 locally, allowing you to quickly experience the basic functionality of SONiC.
There are several ways to run SONiC locally, such as docker + vswitch, p4 software switch, etc. For first-time users, using GNS3 may be the most convenient way, so here, we will use GNS3 as an example to explain how to build a SONiC lab locally. So, let's get started!
Prepare GNS3
First, in order to easily and intuitively establish a virtual network for testing, we need to install GNS3.
GNS3, short for Graphical Network Simulator 3, is (obviously) a graphical network simulation software. It supports various virtualization technologies such as QEMU, VMware, VirtualBox, etc. With it, when we build a virtual network, we don't have to run many commands manually or write scripts. Most of the work can be done through its GUI, which is very convenient.
Install Dependencies
Before installing it, we need to install several other software: docker, wireshark, putty, qemu, ubridge, libvirt, and bridge-utils. If you have already installed them, you can skip this step.
First is Docker. You can install it by following the instructions in this link: https://docs.docker.com/engine/install/
Installing the others on Ubuntu is very simple, just execute the following command. Note that during the installation of ubridge and Wireshark, you will be asked if you want to create the wireshark user group to bypass sudo. Be sure to choose Yes.
sudo apt-get install qemu-kvm libvirt-daemon-system libvirt-clients bridge-utils wireshark putty ubridge
Once completed, we can proceed to install GNS3.
Install GNS3
On Ubuntu, the installation of GNS3 is very simple, just execute the following commands:
sudo add-apt-repository ppa:gns3/ppa
sudo apt update
sudo apt install gns3-gui gns3-server
Then add your user to the following groups, so that GNS3 can access docker, wireshark, and other functionalities without using sudo.
for g in ubridge libvirt kvm wireshark docker; do
    sudo usermod -aG $g <user-name>
done
If you are not using Ubuntu, you can refer to their official documentation for more detailed installation instructions.
Prepare the SONiC Image
Before testing, we need a SONiC image. Since SONiC supports various vendors with different underlying implementations, each vendor has their own image. In our case, since we are creating a virtual environment, we can use the VSwitch-based image to create virtual switches: sonic-vs.img.gz.
The SONiC image project is located here. Although we can compile it ourselves, the process can be slow. To save time, we can directly download the latest image from here. Just find the latest successful build and download the sonic-vs.img.gz file from the Artifacts section.
Next, let's prepare the project:
git clone --recurse-submodules https://github.com/sonic-net/sonic-buildimage.git
cd sonic-buildimage/platform/vs

# Place the downloaded image in this directory and then run the following command to extract it.
gzip -d sonic-vs.img.gz

# The following command will generate the GNS3 image configuration file.
./sonic-gns3a.sh
After executing the above commands, you can run the ls command to see the required image file.
r12f@r12f-svr:~/code/sonic/sonic-buildimage/platform/vs
$ l
total 2.8G
...
-rw-rw-r--  1 r12f r12f 1.1K Apr 18 16:36 SONiC-latest.gns3a  # <= This is the GNS3 image configuration file
-rw-rw-r--  1 r12f r12f 2.8G Apr 18 16:32 sonic-vs.img        # <= This is the image we extracted
...
Import the Image
Now, run gns3 in the command line to start GNS3. If you are SSHed into another machine, you can try enabling X11 forwarding so that you can run GNS3 remotely, with the GUI displayed locally on your machine. And I made this working using MobaXterm on my local machine.
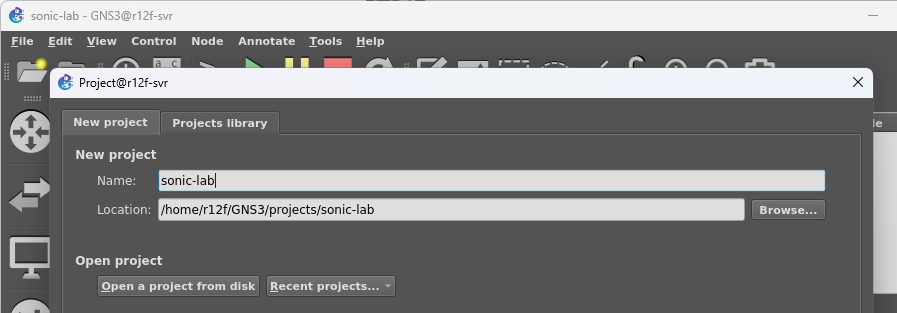
Once it's up and running, GNS3 will prompt us to create a project. It's simple, just enter a directory. If you are using X11 forwarding, please note that this directory is on your remote server, not local.
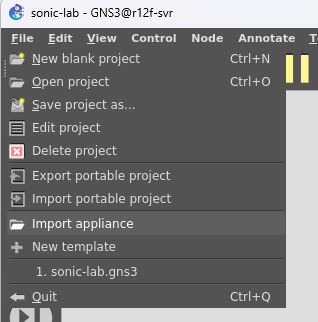
Next, we can import the image we just generated by going to File -> Import appliance.
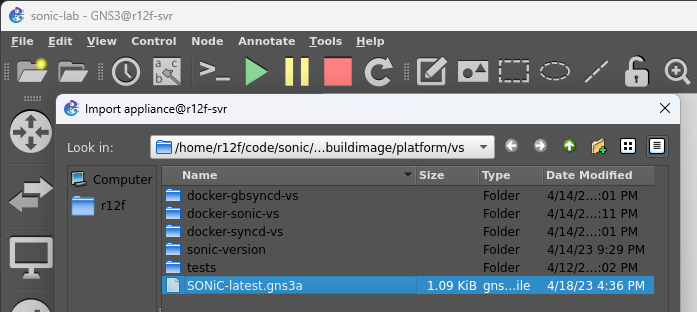
Select the SONiC-latest.gns3a image configuration file we just generated and click Next.
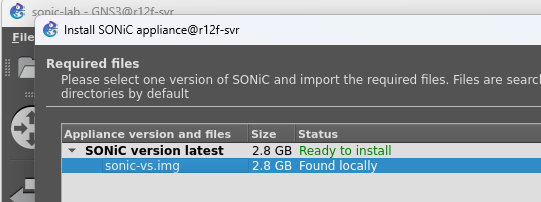
Now you can see our image, click Next.
At this point, the image import process will start, which may be slow because GNS3 needs to convert the image to qcow2 format and place it in our project directory. Once completed, we can see our image.
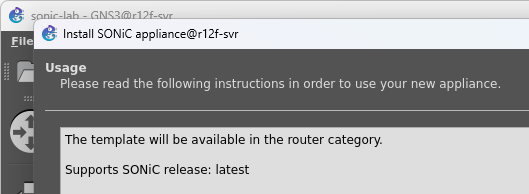
Great! We're done!
Create the Network
Alright! Now that everything is set up, let's create a virtual network!
The GNS3 graphical interface is very user-friendly. Basically, open the sidebar, drag in the switch, drag in the VPC, and then connect the ports. After connecting, remember to click the Play button at the top to start the network simulation. We won't go into much detail here, let's just look at the pictures.
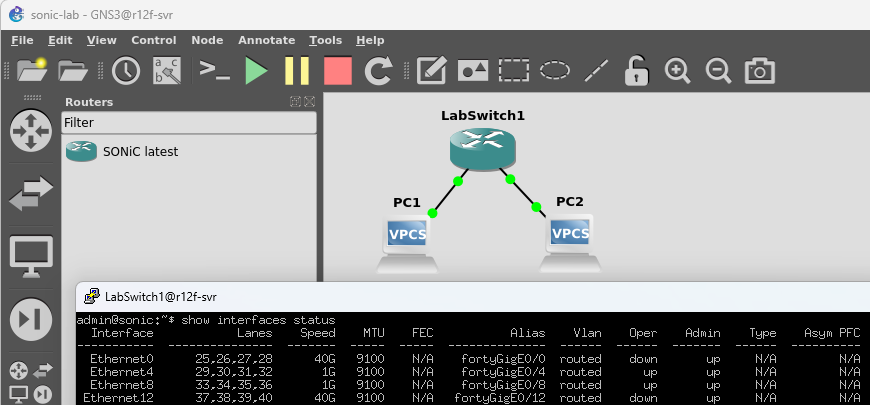
Next, right-click on the switch, select Custom Console, then select Putty to open the console of the switch we saw earlier. Here, the default username and password for SONiC are admin and YourPaSsWoRd. Once logged in, we can run familiar commands like show interfaces status or show ip interface to check the network status. Here, we can also see that the status of the first two interfaces we connected is up.
Configure the Network
In SONiC software switches, the default ports use the 10.0.0.x subnet (as shown below) with neighbor paired.
admin@sonic:~$ show ip interfaces
Interface    Master    IPv4 address/mask    Admin/Oper    BGP Neighbor    Neighbor IP
-----------  --------  -------------------  ------------  --------------  -------------
Ethernet0              10.0.0.0/31          up/up         ARISTA01T2      10.0.0.1
Ethernet4              10.0.0.2/31          up/up         ARISTA02T2      10.0.0.3
Ethernet8              10.0.0.4/31          up/up         ARISTA03T2      10.0.0.5
Similar to what we mentioned in installation, we are going to create a simple network by creating a small VLAN and including our ports in it (in this case, Ethernet4 and Ethernet8):
# Remove old config
sudo config interface ip remove Ethernet4 10.0.0.2/31
sudo config interface ip remove Ethernet8 10.0.0.4/31

# Create VLAN with id 2
sudo config vlan add 2

# Add ports to VLAN
sudo config vlan member add -u 2 Ethernet4
sudo config vlan member add -u 2 Ethernet8

# Add IP address to VLAN
sudo config interface ip add Vlan2 10.0.0.0/24
Now, our VLAN is created, and we can use show vlan brief to check:
admin@sonic:~$ show vlan brief
+-----------+--------------+-----------+----------------+-------------+-----------------------+
|   VLAN ID | IP Address   | Ports     | Port Tagging   | Proxy ARP   | DHCP Helper Address   |
+===========+==============+===========+================+=============+=======================+
|         2 | 10.0.0.0/24  | Ethernet4 | untagged       | disabled    |                       |
|           |              | Ethernet8 | untagged       |             |                       |
+-----------+--------------+-----------+----------------+-------------+-----------------------+
Now, let's assign a 10.0.0.x IP address to each host.
# VPC1
ip 10.0.0.2 255.0.0.0 10.0.0.1

# VPC2
ip 10.0.0.3 255.0.0.0 10.0.0.1
Alright, let's start the ping!
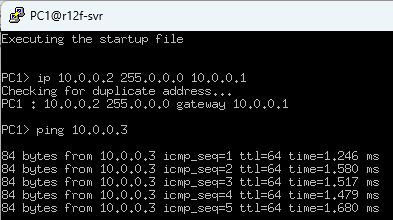
It works!
Packet Capture
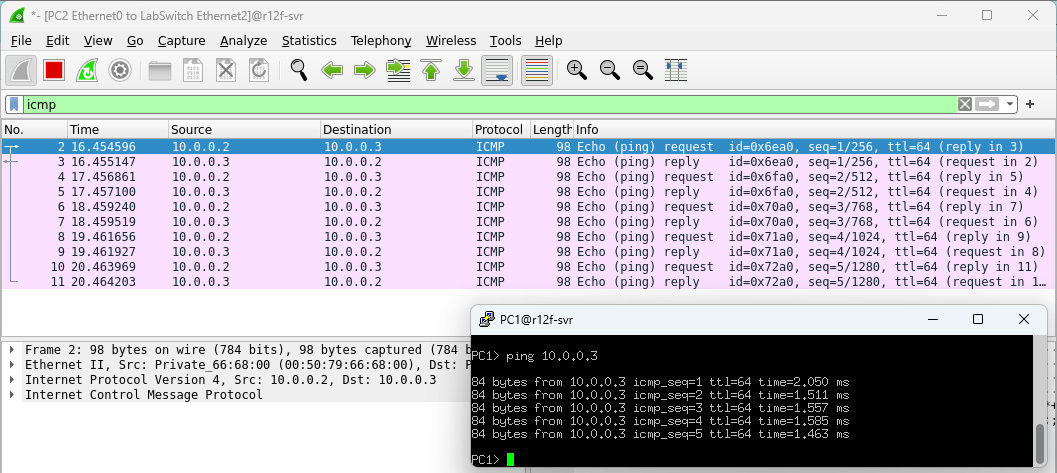
Before installing GNS3, we installed Wireshark so that we can capture packets within the virtual network created by GNS3. To start capturing, simply right-click on the link you want to capture on and select Start capture.
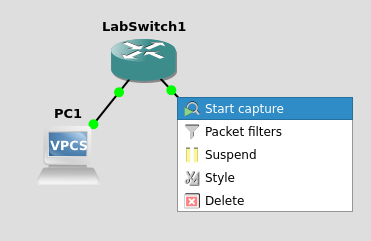
After a moment, Wireshark will automatically open and display all the packets in real-time. Very convenient!
More Networks
In addition to the simplest network setup we discussed above, we can actually use GNS3 to build much more complex networks for testing, such as multi-layer ECMP + eBGP, and more. XFlow Research has published a very detailed document that covers these topics. Interested folks can refer to the document: SONiC Deployment and Testing Using GNS3.